INTEGRATION TEST WITH REMOTE TOMCAT
Tomcat is simply a servlet container which lacks Enterprise Java capabilities like JPA (persistence) and JTA (transactions), so we will install the OpenEJB for Tomcat plug-in. Rather than package JumpStart into an EAR we will package it in a WAR in Collapsed EAR format.Prepare Tomcat 5.5.x or 6.0.x for JumpStart
- Assuming you have a normal working Tomcat 5.5 or 6.0 installation...
- Install the OpenEJB plugin:
- Download openejb.war (OpenEJB for Tomcat).
- Copy openejb.war to ${catalina.base}/webapps/ (Note: the file must be named openejb.war)
- Start Tomcat if it is not already running.
...in Windows:- cd /devel/apache-tomcat-6.0.18/bin
- catalina.bat start
- cd /devel/apache-tomcat-6.0.18/bin
- ./catalina.sh start
- Visit http://localhost:8080/openejb/installer and click the 'install' button.
- Stop Tomcat with catalina:
...in Windows:- cd /devel/apache-tomcat-6.0.18/bin
- catalina.bat stop
- cd /devel/apache-tomcat-6.0.18/bin
- ./catalina.sh stop
- Add Hibernate to Tomcat:
- Modify the add.hibernate.to.dir property in the JumpStart project's data_util.properties file.
- Run the add-hibernate-to-a-server target of the JumpStart project's data_tuil.xml Ant file.
- Check Tomcat's common/lib/ now has the Hibernate jars, eg. hibernate-core-3.3.1.GA.jar.
- Add log4j and jndi config.
- Copy log4j.jar from business/src/test/lib-test/ to Tomcat's common/lib/.
- Copy log4j.properties from business/src/test/conf-tomcat-remote/ to Tomcat's common/classes/.
- Copy jndi.properties from business/src/test/conf-tomcat-remote/ to Tomcat's common/classes/.
- Tell Hibernate to drop and create the database tables at restart:
Caution: DO NOT DO THIS STEP IN A PRODUCTION ENVIRONMENT as all existing data will be lost.
Include the following system property in the JAVA_OPTS environment variable. The property is explained here: hibernate:-Dhibernate.hbm2ddl.auto=create-drop
- set JAVA_OPTS=-Dhibernate.hbm2ddl.auto=create-drop
- setenv JAVA_OPTS '-Dhibernate.hbm2ddl.auto=create-drop'
- Start Tomcat with catalina (as above):
Prepare the build
- In the project's build.properties file, edit the value of these properties:
- deployment.server.type
- deployment.persistence.descriptor
- deployment.web.descriptor
- integration.test.server.dir.
Either build and run the tests from Ant...
Ant will compile, package and deploy jumpstart.war to the server, wait for it to load,
then run the integration test suite which will test through the session beans running in the server.
- Run the Ant target clean-compile-test-package-integrationtest in the project's build.xml file.
- If you get an error about JAVA_HOME, read this. Use a JDK 1.5 tools.jar.
...or build with Ant and run/debug the tests from Eclipse
First, use Ant to compile, package and deploy jumpstart.war to the server and wait for it to load:
- Run the Ant target clean-compile-test-package-preintegrationtest in the project's build.xml file.
- If you get an error about JAVA_HOME, read this. Use a JDK 1.5 tools.jar.
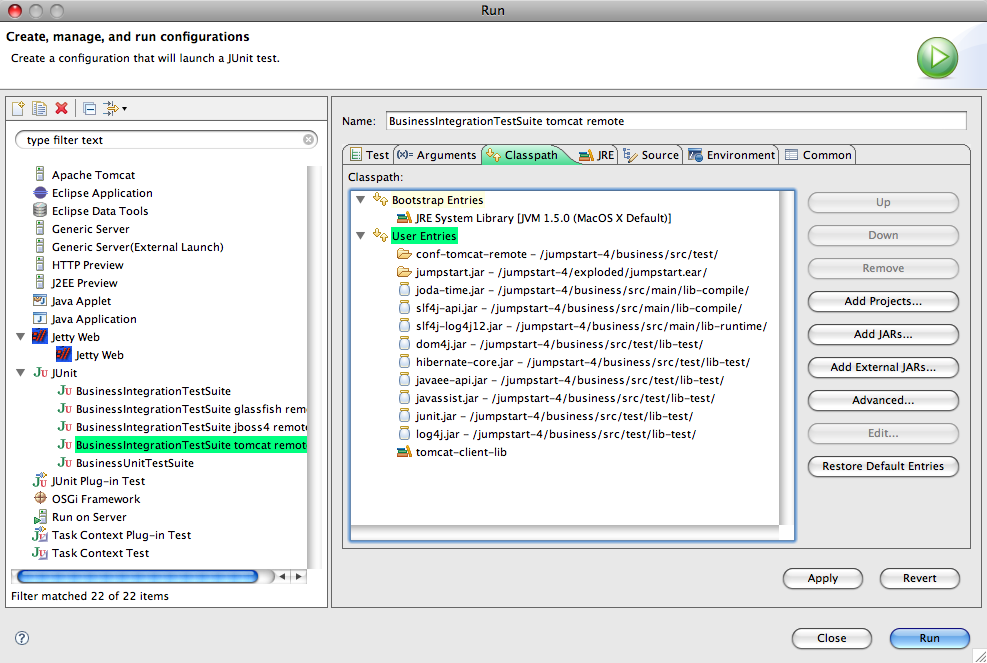
- In Eclipse, choose Window > Preferences > Java > Build Path > User Libraries (or in OS X, choose Eclipse > Preferences > Java > Build Path > User Libraries), and
- create a new user library called tomcat-client-lib, then
- add Tomcat's webpps/openejb/lib/openejb-client-3.1.jar file to the new user library.
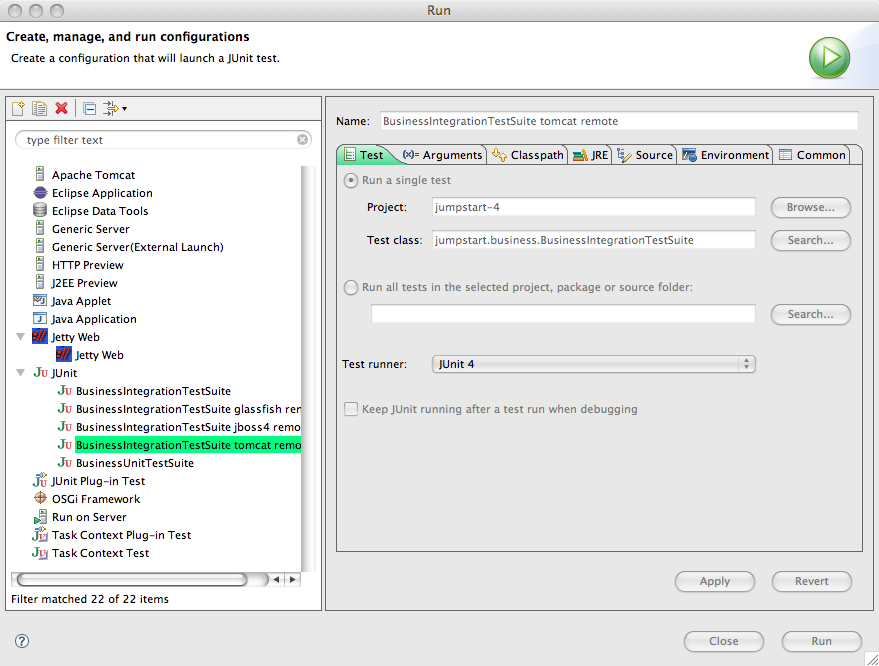
- Choose Run > Open Run Dialog.... The Run window will appear.
- Right-click on JUnit and choose New.

|
|
- Click on the Classpath tab.
- Click Run.
- Watch the results in the JUnit View panel. In the Console View you might see lots of exceptions but that's normal. The JUnit View will tell you quickly whether the tests succeeded or not.
Problems? Eclipse might not be ready for junit - see Could not create task or type of type: junit.

